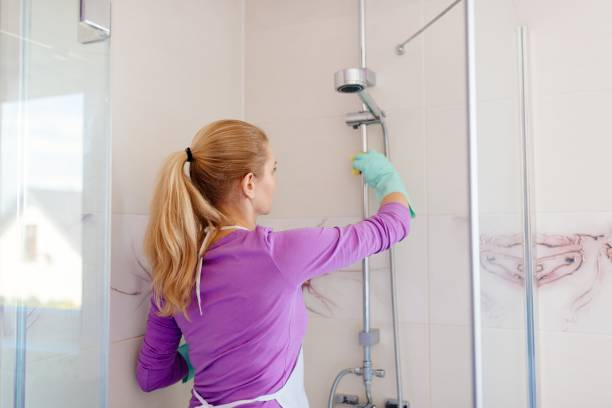
Making your shower sparkle from top to bottom may seem like a daunting task, but with the right steps and techniques, it becomes straightforward and efficient. In this article, we’ll provide a step-by-step guide to achieve a pristine shower, including essential tools, cleaning solutions, and useful tips.
Gather Your Cleaning Supplies

Before you begin, make sure you have all the necessary cleaning supplies. Having the right tools and products at hand will make the cleaning process more efficient and less frustrating. Essential items include a scrub brush, sponge, microfiber cloth, bucket, and a squeegee. You may also need specialized cleaners, such as a tile cleaner, mildew remover, and a general-purpose bathroom cleaner.
Here’s a list of recommended supplies:
- Scrub brush and sponge
- Microfiber cloth
- Squeegee
- Bucket
- Tile cleaner
- Mildew remover
- General-purpose bathroom cleaner
- Gloves (optional)
Once you have gathered all your supplies, you are ready to move on to the next step of cleaning your shower from top to bottom.
Start with the Showerhead
The first place to start is the showerhead. Over time, mineral deposits and grime can accumulate, affecting the water flow and quality. To clean the showerhead, fill a plastic bag with white vinegar and secure it over the showerhead with a rubber band, ensuring it is fully submerged. Let it sit for at least an hour. Then, remove the bag and scrub the showerhead with an old toothbrush to remove any remaining residue.
Once cleaned, run hot water through the showerhead to rinse out the vinegar and any loosened debris. This method not only clears buildup but also helps to disinfect the showerhead, leaving it sparkling and functioning optimally.
Clean the Tiles and Grout
Next, focus on the shower tiles and grout. Tiles can accumulate soap scum, hard water stains, and mildew, while grout can harbor mold and mildew. To clean tiles, spray a tile cleaner or a vinegar-water mixture onto the surfaces and let it sit for a few minutes to break down the grime. Use a scrub brush or sponge to scrub the tiles thoroughly. Rinse the tiles with warm water and wipe them with a microfiber cloth.
For grout, apply a mildew remover or a baking soda paste (made by mixing baking soda with a small amount of water) directly onto the grout lines. Use a grout brush or an old toothbrush to scrub vigorously. Rinse with warm water and pat dry with a cloth to prevent new mildew growth.
Address the Shower Door or Curtain
Now, move on to cleaning the shower door or curtain. For glass doors, a glass cleaner or a vinegar-water solution works well. Spray the cleaner on the glass and use a squeegee to wipe it clean, removing any streaks. If the door has mineral deposits or soap scum, you may need to use a paste made from baking soda and water, scrubbing with a non-abrasive sponge.
If your shower has a curtain, remove it and launder it according to the manufacturer’s instructions. For plastic curtains, you can also soak them in a bathtub filled with warm water and a cup of vinegar, then scrub gently to remove mildew and soap scum. Rinse thoroughly and hang to dry before reattaching.
Finish with the Shower Floor
The last step is to clean the shower floor, where dirt and soap tend to accumulate the most. Depending on the type of flooring, you might need a specific cleaner. For tile floors, use a tile cleaner or a vinegar-water solution, scrubbing with a brush or sponge. For acrylic or fiberglass floors, use a non-abrasive cleaner to avoid scratching the surface.
Rinse the floor thoroughly with warm water and give it a final wipe with a microfiber cloth or a squeegee. Ensure no residue is left behind, as it can create slippery patches. A clean floor not only looks better but is also safer and more hygienic.
Conclusion
Cleaning a shower so it sparkles from top to bottom involves a systematic approach, utilizing the right tools and cleaning agents for each surface. By following the steps outlined above, you can efficiently tackle grime, soap scum, and mildew, leaving your shower gleaming and fresh. Regular maintenance and proper cleaning techniques will help extend the life of your shower and maintain a pleasant bathing environment.
FAQs
How often should I clean my shower?
It’s recommended to clean your shower at least once a week to prevent the buildup of soap scum, mildew, and hard water stains. Frequent cleaning ensures a hygienic and pleasant shower experience.
Can I use bleach to clean my shower?
Yes, you can use bleach to clean your shower, especially for tough mildew and mold stains. However, use bleach in a well-ventilated area and wear gloves to protect your skin. Always rinse thoroughly after cleaning.
What natural cleaners can I use for my shower?
Natural cleaners such as white vinegar, baking soda, and lemon juice can effectively clean your shower. They are non-toxic and environmentally friendly alternatives to harsh chemicals.
How do I prevent mildew in my shower?
To prevent mildew, ensure your shower is well-ventilated by using an exhaust fan or opening a window. Wipe down the walls and floor after each use and keep the shower door or curtain open to allow it to dry completely.
What should I do if my shower has stubborn stains?
For stubborn stains, you may need a stronger cleaner or a specialized product designed for the type of stain. Allow the cleaner to sit on the stain for a longer period before scrubbing. If the stains persist, consider reaching out to professional cleaning services for assistance.
